Showing posts with label biscuits. Show all posts

Monday, May 19, 2014

Pineapple Upside Down Biscuits


Pineapple Upside Down Biscuits. Lucy Mercer/A Cook and Her Books

Introducing a new favorite around our house, Pineapple Upside Down Biscuits. Do I even need to tellyou that this is a Paula Deen recipe from the word go? My husband saw Miss Paula talking about her recipe for Pineapple Upside Down Biscuits a while back, and asked me to make a pan of them, after all, Pineapple Upside Down Cake is his very favorite cake. Miss Paula's innovation is to create individual servings by placing the pineapple and brown sugar mixture into a muffin pan. Miss Paula pops open a tube of biscuits to top off her little cakes and I thought why not make a homemade biscuit and wouldn't they be even better? And you know what? I was right.


Pineapple Upside Down Biscuits

1 (10 oz.) can crushed pineapple, drained, with juice reserved
½ cup light brown sugar
½ stick butter, melted
12 maraschino cherries

1.       Preheat oven to 400. Grease muffin tins.
2.       Combine pineapple, sugar and butter in a small bowl and mix well. Divide mixture among the muffin cups. Place cherry firmly in center of each muffin cup.


Biscuits

2 cups all-purpose flour, White Lily preferred
1 tablespoon baking powder
1 teaspoon salt
1 teaspoon sugar
4 tablespoons shortening, chilled
1 cup buttermilk, whole milk preferred (I use Marburger brand)

1.       Into a medium bowl, sift flour, baking powder, salt and sugar. Add shortening and cut the fat into the flour using a fork or pastry blender. I use my fingers to rub the fat into the flour ~ it’s messy, but I get a better feel for how the fat is distributed throughout the flour.
2.       Pour in buttermilk and using a large spoon, stir until a dough is formed. With a light touch, place dough on lightly floured counter, gently press out with your hands to a uniform 1/2-inch thickness and cut out 1 dozen, 2-inch biscuits. I usually end up with 14, so you may have extras to bake alongside the pineapple biscuits.
3.       Place biscuits on top of pineapple mixture. Bake in 400 degree oven for about 13 minutes. Biscuits will be lightly brown and spring back when done. Place muffin pan on countertop to cool for five minutes.
4.       Cover a baking sheet with foil and turn muffin pan out onto baking sheet. Serve biscuits warm. Store leftovers in a covered container and refrigerate.

Text and images copyright 2014, Lucy Mercer.

Saturday, October 13, 2012

The easiest from-scratch biscuits you will ever make

Emeril's Cheddar and Green Onion Biscuits with bacon. Lucy Mercer/A Cook and Her Books

 Biscuit making is one of those revered arts, right up there with pie-crust-making, that holds fear and anxiety in its elusive and sticky hands. The fact is, both of these pastry skills were essential and probably inconsequentially everyday for women a century ago, but now that the kitchen is a choice, and thank goodness for that, biscuit making manages to be terrifying even though it is actually a very simple process. Fat combined with flour, some salt, some leavening, bound with liquid, pressed into a disk, punched into shape and baked.

The problem, of course, presents itself in the choices - what fat, what flour, what leavening? The novice cook may wonder 'What does it mean to "handle gently?" or to "cut in butter?" Given the variations and complexities of the subject, it's no wonder that people will pop open a tube of biscuits and call it breakfast. (Or for the moms in the know, bake up the frozen biscuits, because, I know, they really are that good.)

When you're ready to give biscuit-making a try, go to this recipe from "Emeril's Kicked-Up Sandwiches" for Cheddar-Green Onion Biscuits. It's the delivery device for a fried chicken breast and a shmear of redeye gravy, but bake up a batch of these and they're pretty darn good solo. Plus, this cream biscuit is near foolproof. Even if you manage to overwork the dough, (and if you follow the directions, you won't,) but if you do, there's enough fat to make up for it. Between the butter and the cream, you are covered.

Cheese and onion go into the dry ingredients. Lucy Mercer/A Cook and Her Books


Cutting out biscuits. Lucy Mercer/A Cook and Her Books

"Painting" the biscuits with what else? Melted butter. Lucy Mercer/A Cook and Her Books
This post is part of #SeriousSandwich, a blogalong for Emeril Lagasse's newest cookbook, "Emeril's Kicked-Up Sandwiches." Look for more recipes from the #SeriousSandwich bloggers by following hashtag #SeriousSandwich on Twitter.

Text and images copyright 2012, Lucy Mercer.


If you love cookbooks like I do, you gotta follow The Secret Ingredient Blog from Morrow Books

Tuesday, February 21, 2012

Meyer lemon scones with dried blueberries

Scones with Meyer lemon and blueberries. Lucy Mercer/A Cook and Her Books

Lemons and blueberries are a natural pairing, and the winter version of this is Meyer lemons, the lemon-orange hybrid available for just a short while, and dried blueberries. Frieda's Specialty Produce sent me a package that included dried blueberries, just as sweet as mid-summer berries at the u-pick orchard. I folded the berries into my favorite buttermilk scone recipe, and freshened the dough with Meyer lemon zest and a glaze made with the juice.

Meyer lemon scones with dried blueberries
My favorite tip for tender scones is to shred chilled butter into the dry ingredients. I just use an ordinary grater, the kind I use for shredding cheddar cheese, and run the chilled stick of butter across it. The resulting butter curls are uniform and perfect for blending into the flour mixture.


3 cups unbleached all-purpose flour
1/3 cup sugar
1 teaspoon salt
2 1/2 teaspoons baking powder
1/2 teaspoon baking soda
3/4 cup unsalted butter, frozen
1 1/4 cups buttermilk

Zest of one Meyer (or other) lemon
Juice of one-half Meyer (or other) lemon
1/2 cup dried blueberries
Milk or cream for glazing
Turbinado, demerara or sparkle sugar for glazing

1
. In a batter bowl, mix dry ingredients together. Using a regular grater, shred the chilled butter and with a light hand, gently mix the shavings into the dry ingredients. Using your hands and a gentle, quick touch, make sure the butter is evenly distributed throughout the flour mixture.

2. Pour in the buttermilk and stir gently with either a wooden spoon or my instrument of choice, a silicone spatula. Add lemon juice and zest. If mixture seems dry, add additional buttermilk until a cohesive dough forms. The dough should be slightly wet and sticky, but not overly so.


3. On a floured countertop, press dough into a rough 12 X 6 inch rectangle (helpful shaping instruction visuals may be found on my basic scone post 
here). Spread dried blueberries onto dough, using your hands to press the fruit into the dough. Fold into thirds, letter-style. Press into 12 X 6 rectangle again and fold letter-style again. If any little fruits pop out, just press them back into the dough. Press again into a 12 X 6 rectangle and cut into 16 triangles. Place scones on a lined baking sheet. The scones can be refrigerated, covered, for up to 24 hours.

4. When ready to bake, preheat oven to 400 degrees. Carefully brush each wedge with buttermilk or cream and sprinkle turbinado sugar over the top. Bake at 400 for at least 15 minutes. They may need a bit more time, depending on your oven, convection, etc. Scones are ready when they are golden brown on top and bounce back when touched lightly in the center.

Wednesday, July 6, 2011

Buttermilk scones for breakfast


Brown-sugar topped buttermilk scones by Lucy Mercer/A Cook and Her Books
 I've made some lovely scones lately, blueberry- and raspberry-filled gems, luscious apricot pastries, another version with ginger and pineapple. These sweet biscuits are always appreciated around my house, but there are times when I don't need 16 buttery treats sitting on my counter, waiting for someone to devour them. This is why I developed the buttermilk scone half recipe, using less than one stick of butter and creating just enough pastries for my family to enjoy and maybe a few to bring to work. This version also takes about half as much time to assemble, so it's easier than ever to whip these up for breakfast.

Here's the recipe and if using fruit, be sure to follow the step-by-step folding technique in the Blueberry Lemon Buttermilk Scone post.


Buttermilk scones ready for the oven by Lucy Mercer/A Cook and Her Books

Buttermilk Scones Half Recipe


Yield: 8 scones
1 1/2 cups unbleached all-purpose flour

2 tablespoons sugar

1/2 teaspoon salt

1 1/4 teaspoons baking powder

1/4 teaspoon baking soda

3/4 (6 tablespoons) stick unsalted butter, chilled or frozen

1/2 cup + 2 tablespoons buttermilk (whole if you can find it)

1. In a batter bowl, mix dry ingredients together. Using a regular grater, shred the cold butter and lightly mix the shavings into the dry ingredients. Using your hands and a gentle, quick touch, make sure the butter is evenly distributed throughout the flour mixture.

2. Pour in the buttermilk and stir gently with either a wooden spoon or my instrument of choice, a silicone spatula. If mixture seems dry, add additional buttermilk until a cohesive dough forms. The dough should be slightly wet and sticky, but not overly so.

3. On a floured countertop, press dough into a rough rectangle and if using fruit, follow shaping instructions here. Cut into 8 triangles. Place scones on a lined baking sheet. The scones can be refrigerated, covered, for up to 24 hours.

4. When ready to bake, preheat oven to 400 degrees. Carefully brush each wedge with buttermilk or cream and sprinkle sugar over the top. Bake at 400 for at least 15 minutes. They may need a bit more time, depending on your oven, convection, etc. Scones are ready when they are golden brown on top and bounce back when touched lightly in the center.


Tuesday, July 5, 2011

Adventures in scone-making: Cream cheese apricot scones


Cream cheese apricot scones by Lucy Mercer/A Cook and Her Books

On this fifth day of July, I'll celebrate our great country and the English language by creating a new word: scone-making. Probably not that earth-shattering a notion, but scone-making has taken up a fair bit of my baking time lately. It all started with a refinement of my everyday buttermilk scones, which have been gussied-up with fresh blueberries and raspberries.

As I've shared my scone-making adventures, I've discovered that not everyone in my world knows about scones. Which is completely understandable, because here in Georgia, we're smack-dab in the middle of biscuit country. And that's not biscuit as code for "cookie," either. Fluffy, feathery Crisco-and-White Lily goodness - with a bit of friend chicken breast or a sausage patty or pork tenderloin, a satisfying breakfast. Scones are kissing cousins to the Southern biscuit - buttery, sweet relatives that come to the table for breakfast or tea.

Scones are like sweet biscuits - a touch of sugar, and a lot of butter for a tender pastry that's superlative filled with fresh fruit in the summer or split and slathered with preserves in the cooler months. I make them for breakfast, or brunch if I get a late start. Scones can be an afterschool snack, or if supper's late, a teatime treat to tide you over.


Cream cheese apricot scones by Lucy Mercer/A Cook and Her Books

Cream Cheese Apricot Scones

Yield: 16 scones


3 1/4 cups unbleached all-purpose flour

1/2 cup sugar

2 1/2 teaspoons baking powder

1/2 teaspoon salt

1 (8 ounce) package 1/3 less fat (Neufchatel) cream cheese

1/2 cup (1 stick) unsalted butter, chilled and cut into 16 pieces

2 teaspoons vanilla extract

1/4 cup whole milk

1 cup diced, dried apricots

Demerara or sparkling sugar for garnish, optional


1. Preheat oven to 400. Line a baking sheet with parchment paper or a Silpat.

2. In a medium bowl, whisk together the flour, sugar, baking powder and salt. Cut in cream cheese and then butter, using your fingers, two forks or a pastry cutter, until the butter and cream cheese are nuggets the size of peas.

3. In a separate container, whisk together the milk, egg and vanilla. Add the wet ingredients to the dry ingredients and stir gently with a fork or spoon. Turn the dough onto a floured surface and following the step-by-step technique for forming the Blueberry Lemon Buttermilk Scones, pat the dough into a 12 X 6 inch rectangle.
 
4. Spread the diced apricots over the rectangle and press the fruit into the dough. Fold the dough into thirds, letter-style. Press the dough into a 12 X 6 rectangle again and repeat the letter fold. Press the dough into a 12 X 6 rectangle for the final time and using a sharp knife or bench knife, cut dough into four equal rectangles. Divide each rectangle in half and each of those squares into triangles, yielding 16 triangle-shaped scones.
 
5. Place scones on baking sheet - it's ok to get them close together because if the dough and kitchen are fairly cool, the scones will puff up rather than spread. Brush each with reserved milk and sprinkle with sparkle or demerara sugar. Bake at 400 degrees for 18 minutes or until golden brown. Serve warm or at room temperature.
 
Recipe adapted from King Arthur Flour.


Tuesday, September 28, 2010

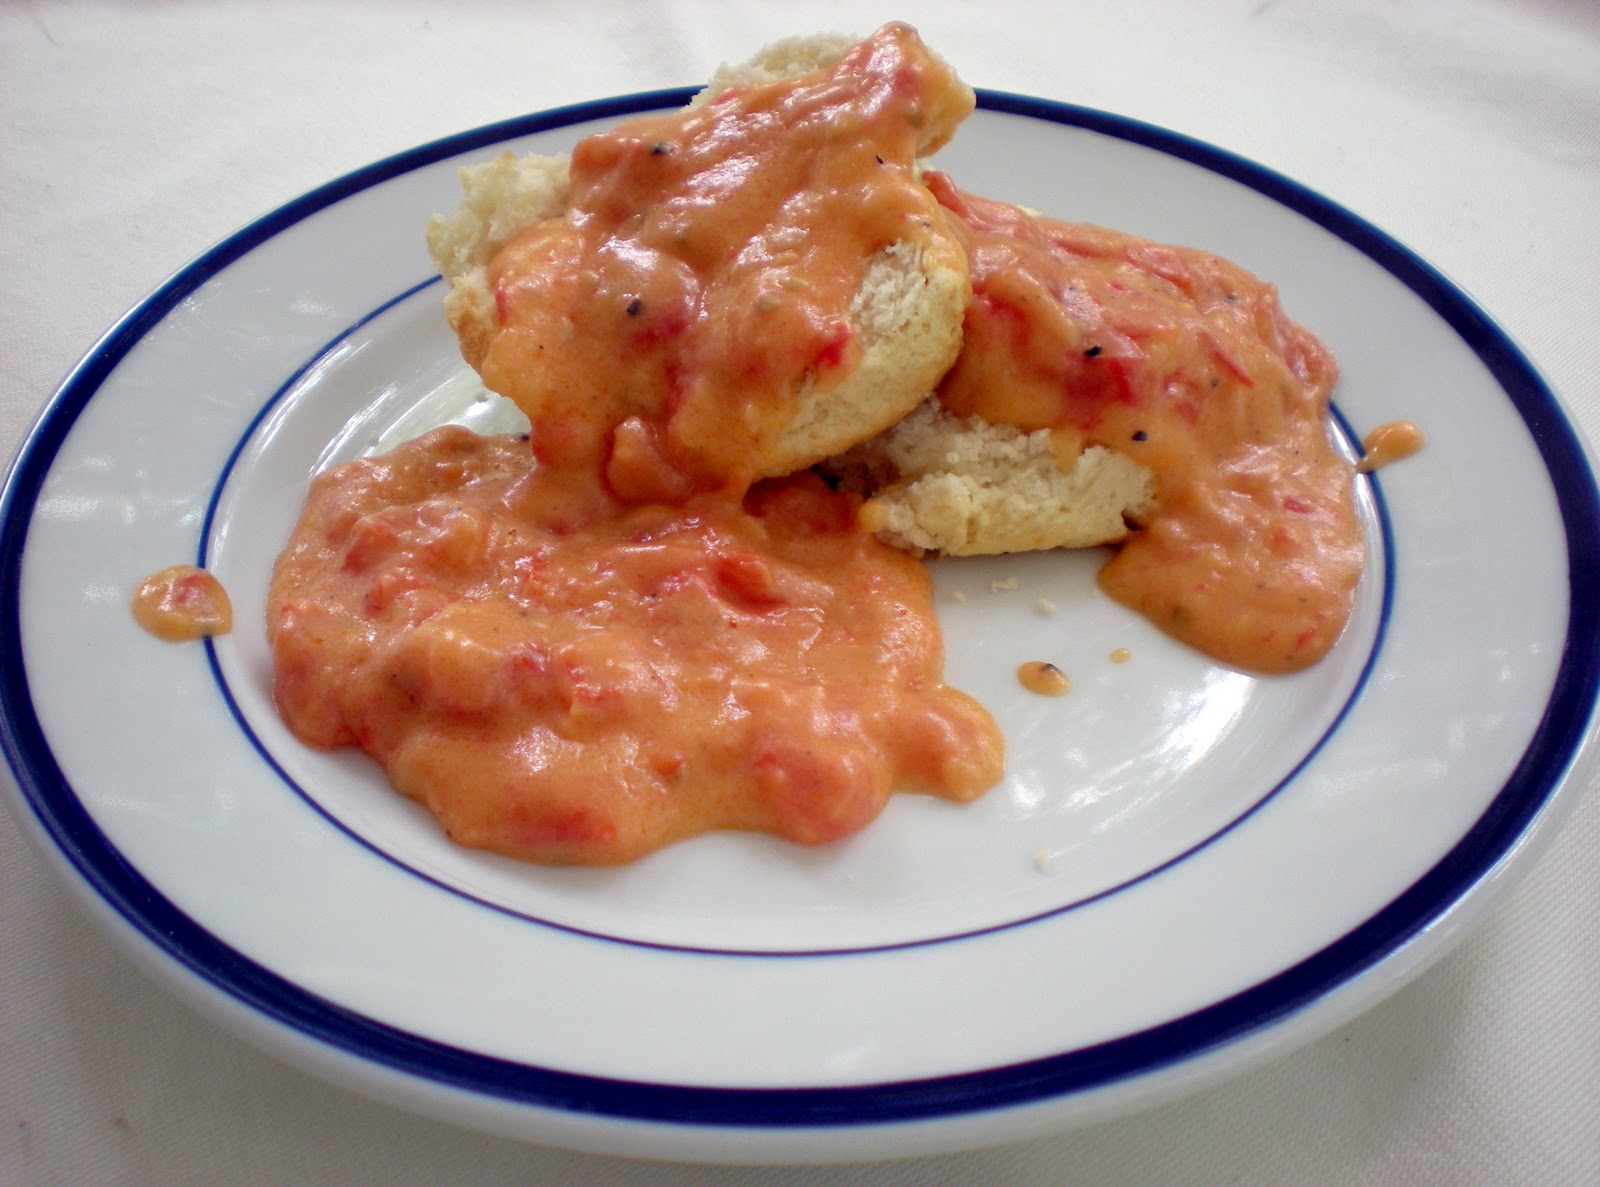
Tomato Gravy & Biscuits


Tomato gravy & biscuits by Lucy Mercer/A Cook and Her Books


 Before the tomatoes fade for another summer, do yourself a favor and make tomato gravy and biscuits for yourself and your family. This isn't the kind of "gravy" or "sauce" that you serve with pasta, just a creamy white gravy with chopped tomatoes, cooked up in a cast iron skillet and served over split buttermilk biscuits. 

My mother was a fine cook, but I did not grow up with this dish. I discovered it through other cooks and writers. Scott Peacock and Edna Lewis write about it in "Gift of Southern Cooking," and if I remember correctly, serve the gravy with fried chicken.
Cooks can spend a lifetime perfecting their biscuit recipes, and I've tried quite a few, but I always go back to the recipe on the back of the bag of White Lily self-rising flour, using whole fat buttermilk, when I can find it, and brushing the tops of the biscuits with melted butter.
This recipe can be made with bacon fat instead of butter. I usually serve bacon alongside and keep the butter in the gravy. 

Farmers' market heirloom tomatoes by Lucy Mercer/A Cook and Her Books
Tomato Gravy

2 tbsp. butter
1/2 cup onion, diced
1 clove garlic, minced
salt and freshly ground pepper
1 tablespoon all-purpose flour
3 ripe tomatoes, peeled, seeded and chopped
1 cup milk
1. In a heavy skillet, melt butter and saute onion until softened. Add garlic, salt and pepper and cook for another minute.

2. Sprinkle the flour over and cook, stirring well for another couple minutes.

3. Stir in the chopped tomato and cook for five more minutes. Slowly add the milk and bring to a simmer. Taste for seasoning, adjust. Serve warm with split buttermilk biscuits and a side of bacon.

Text & images copyright 2010, Lucy Mercer.

Tuesday, July 1, 2008

Tuesday Night Supper

Here's my Tuesday night menu, using two items from the CSA bag - red, ripe tomatoes and fresh zucchini.
Tomato Gravy with Buttermilk Biscuits
Crispy Bacon
Grilled Zucchini
Pineapple Ice Cream Sandwiches
I tried a new buttermilk biscuit recipe, this time from Treasury of Southern Baking by Prudence Hilburn, one of those books I look through a lot and rarely cook from. Her biscuit technique is interesting - using self-rising flour, buttermilk and lard (I subbed Crisco), she mixes all three ingredients together by hand simultaneously. I need to work on my technique, but the biscuits were indeed tender and tasty.
I topped the biscuits with tomato gravy, which is a perfect pantry meal in the wintertime, using canned tomatoes, but heaven in the summer with fresh tomatoes.
Tomato Gravy

from Gift of Southern Cooking by Scott Peacock and Edna Lewis

2 tbsp. bacon fat
1 cup diced onion
2 large cloves garlic, minced
1 tsp. salt
1/2 tsp. freshly ground black pepper
1 1/2 tsp. dried thyme
1 tbsp. all-purpose flour
1 pound tomato, fresh or canned, peeled, seeded, and chopped into 1/2 inch pieces to yield 3/4 cup
1 cup milk

1. Heat the bacon fat in a heavy nonreactive skillet and add the diced onion. Saute over medium-high heat for 5 minutes, stirring often.

2. Add the garlic, 1/2 tsp. of the salt, the pepper and thyme, and cook for another 5 minutes.

3. Sprinkle the flour over and cook, stirring well, for another 2 minutes.

4. Stir in the chopped tomato and the remaining 1/2 tsp. of the salt and cook 5 minutes longer. Slowly stir in the milk and cream and bring to a simmer. Gently simmer for 5 minutes. Taste carefully for seasoning, adding more salt and pepper as needed. Serve hot.